The kitchen is where everything lands — grocery lists, school forms, the note about soccer practice, and the reminder that the dog needs his flea treatment. Somewhere between the fridge magnets and the stack of papers on the counter, most of us lose track of at least one important thing each week. A wooden message board gives all of that chaos a home, and it does it in a way that actually looks like it belongs in your kitchen rather than fighting against it.
What makes wood such a good fit here is its warmth. Kitchens are full of hard surfaces — tile, stone, stainless steel, glass — and a piece of natural timber softens that immediately. You can stain it dark to match your cabinets, leave it pale and Scandinavian, or beat it up a little for a farmhouse feel. Even better, most of these projects use offcuts, pallet boards, or a single plank from the hardware store, so you can build one on a Saturday afternoon without spending much.
Below you’ll find ten DIY wooden message board ideas for kitchens, ranging from a five-minute countertop project to a full command center wall. Each one includes materials, rough timing, and the small details that separate a board that works from one that just hangs there collecting dust. Pick the one that fits your space and your family’s routine — then make it yours.
Quick Answer: A wooden message board for the kitchen is a wall-mounted or countertop wood panel used to hold notes, menus, grocery lists, and reminders. Popular versions include chalkboard menu boards, magnetic grocery list boards, peg rails with clips, recipe card holders, and full command centers made from pallet wood. Most can be built in one to three hours using a plank, stain or paint, basic hardware, and hanging brackets.
1. Rustic Pallet Wood Kitchen Command Center
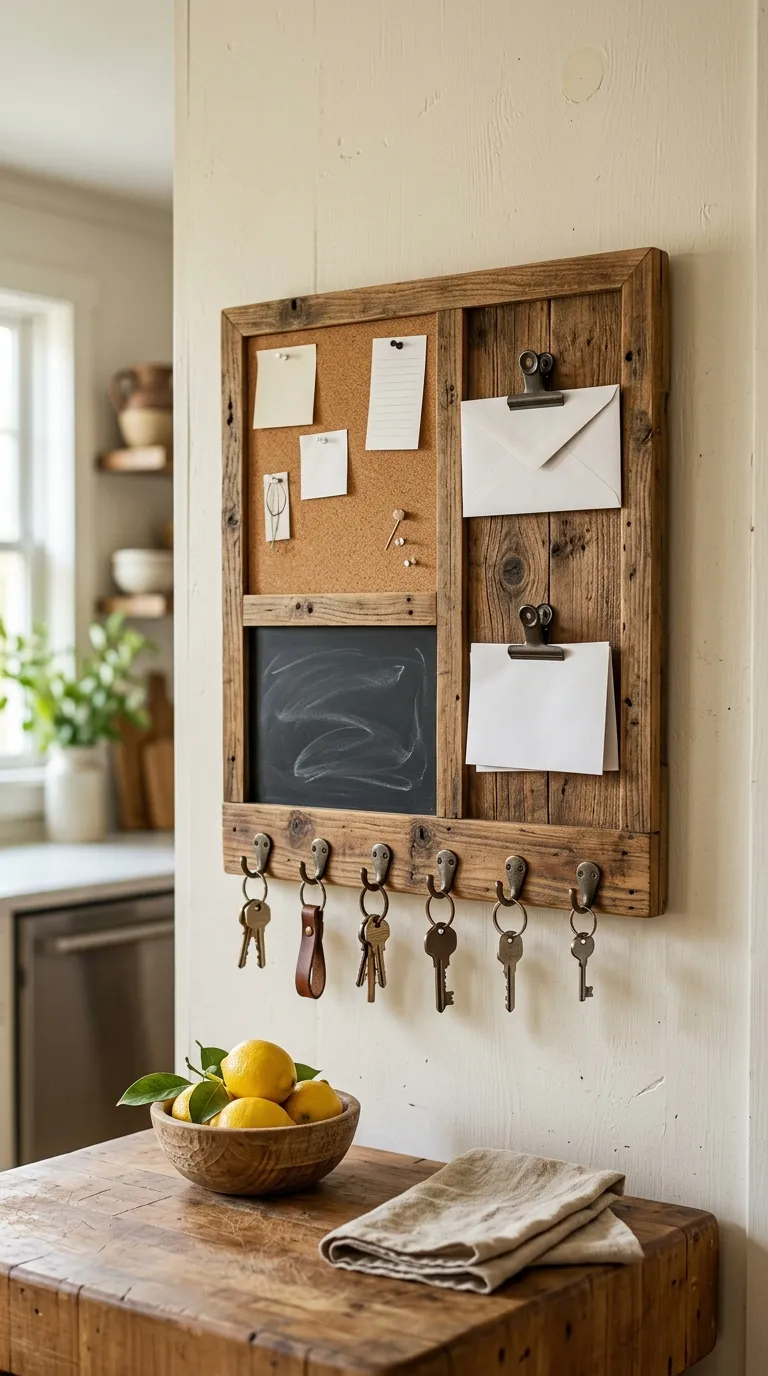
If your family’s paperwork tends to colonize the counter, this is the project that ends it. A command center is a larger board — roughly 24 by 36 inches — divided into zones so each type of note has a place. It’s the most useful of all the DIY wooden message board ideas for kitchens because it grows with your needs.
Materials: four to six pallet slats or cedar fence boards, 120- and 220-grit sandpaper, wood stain or clear polyurethane, a 1×3 backer board, wood screws, a roll of cork or a small chalkboard panel, cup hooks, binder clips, and two D-ring hangers.
How to build it: Cut the backer board to size, then cut the slats slightly longer so they overhang for a shiplap look. Sand thoroughly — pallet wood is often splintery and sometimes dirty, so wear a mask while sanding. Stain or seal the slats and let them dry overnight. Attach the slats to the backer with screws from behind, leaving a gap of about a quarter inch between each one. Then screw a cork square into one corner and a chalkboard panel into another. Finish by mounting cup hooks along the bottom edge for keys and a row of clips across the middle for mail.
Time: two to three hours plus drying. Difficulty: beginner-friendly with a drill and a saw.
💡 Pro Tip: Mount the board at eye level for the tallest person who uses it most, then add a small shelf underneath for pens and chalk. Nothing kills a command center faster than not being able to find a working pen.