
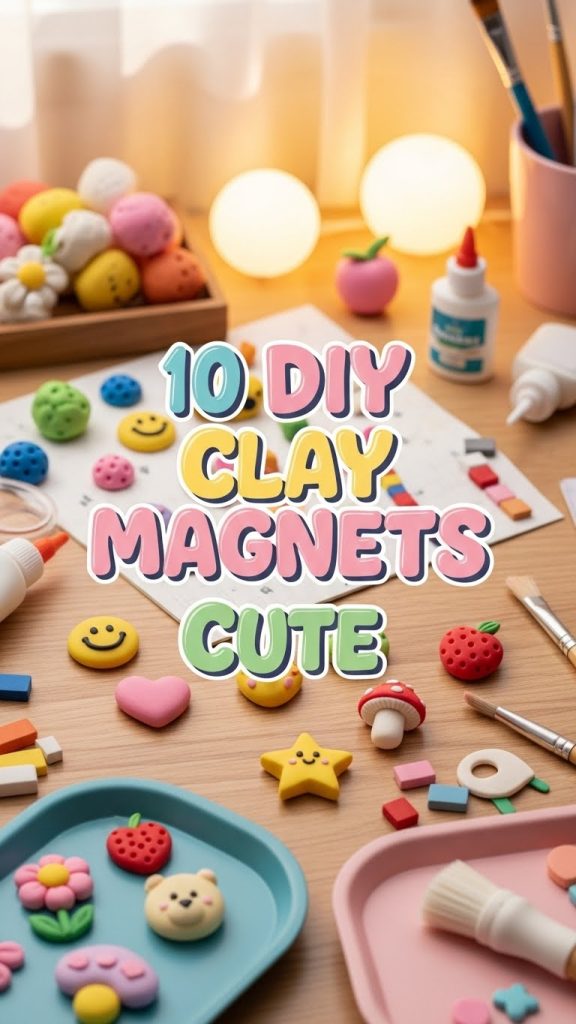
Are you looking for a fun, creative, and affordable way to add personality to your home or workspace? DIY clay magnets are the perfect project. Not only are they easy to make, but they are also incredibly versatile. Whether you are a beginner or an experienced crafter, these cute clay magnets can be customized to fit your style and mood. In this post, we will explore ten unique and adorable DIY clay magnet ideas, along with step-by-step instructions and tips for success.
Why Choose DIY Clay Magnets?
Clay magnets are more than just functional items. They allow you to express your creativity while adding a personal touch to your space. There are several reasons why DIY clay magnets are so popular:
- Affordable Materials: Polymer clay and air-dry clay are inexpensive and widely available.
- Customizable: You can create any shape, color, or pattern you like.
- Perfect for Gifts: Handmade magnets make thoughtful and unique presents for friends and family.
- Stress Relief: Crafting clay can be a relaxing and mindful activity.
- Decorative and Functional: They not only hold notes and photos but also serve as colorful decorations.
Whether you want to create whimsical shapes, realistic food miniatures, or abstract designs, there is a clay magnet idea for everyone.
Materials You Will Need
Before we dive into the ten DIY clay magnet ideas, it’s important to have the right materials on hand. Here is a basic list:
- Polymer clay or air-dry clay: Polymer clay is easier to bake and more durable, while air-dry clay is perfect for no-bake projects.
- Magnets: Small disc magnets work best.
- Clay tools: Sculpting tools, toothpicks, or even household items like pens and knives.
- Acrylic paints: Optional, for painting after baking.
- Gloss glaze: Optional, for a shiny finish.
- Rolling pin: For flattening clay.
- Oven: Only needed for polymer clay.
- Baking sheet and parchment paper: For baking polymer clay.
Once you have these materials, you are ready to start creating your adorable clay magnets.
1. Mini Food Magnets
One of the most popular clay magnet projects is miniature food. These tiny replicas are not only cute but also surprisingly realistic. You can create mini burgers, donuts, cupcakes, or even slices of pizza.
How to Make Mini Food Magnets:
- Condition your clay by kneading it until soft.
- Shape the clay into your desired food item. For example, use brown clay for a burger patty and yellow clay for cheese.
- Add small details using a toothpick or sculpting tool.
- Bake the clay according to package instructions if using polymer clay. Air-dry clay should dry for 24 hours.
- Once cooled, attach a magnet to the back using strong glue.
These miniature food magnets are perfect for your fridge or as gifts for food lovers.

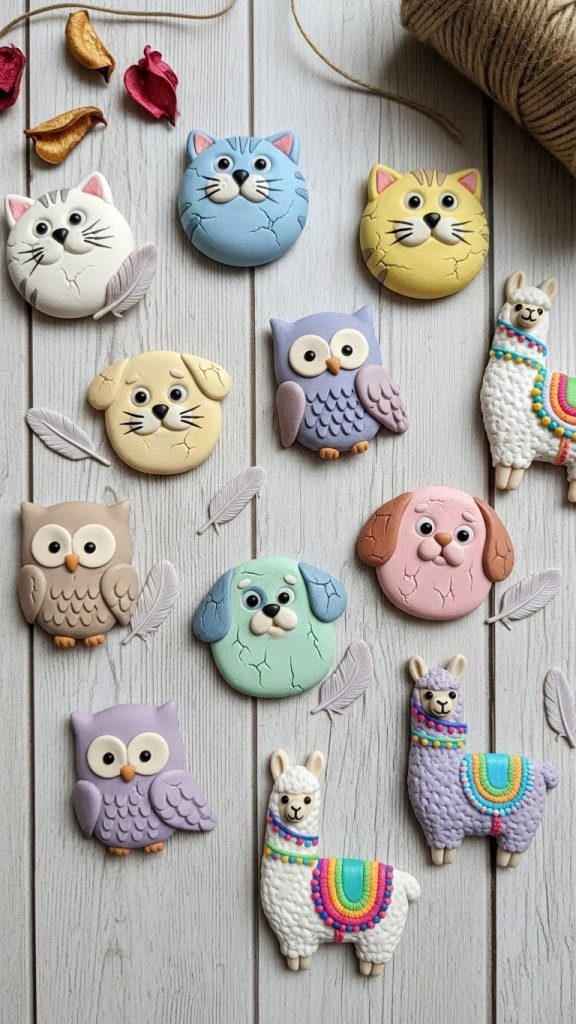
2. Cute Animal Magnets
Animal magnets are a favorite among crafters because they allow for endless creativity. You can create cats, dogs, owls, or even exotic animals like llamas and flamingos.
Steps to Make Cute Animal Magnets:
- Choose a base color for your animal. For a cat, you might choose grey or black.
- Shape the body, head, and ears separately and then combine them.
- Use a toothpick to carve details like eyes, nose, and whiskers.
- Bake or air-dry your clay.
- Attach a magnet to the back using strong adhesive.
Animal magnets are not only adorable but also make a playful addition to any kitchen or office space.
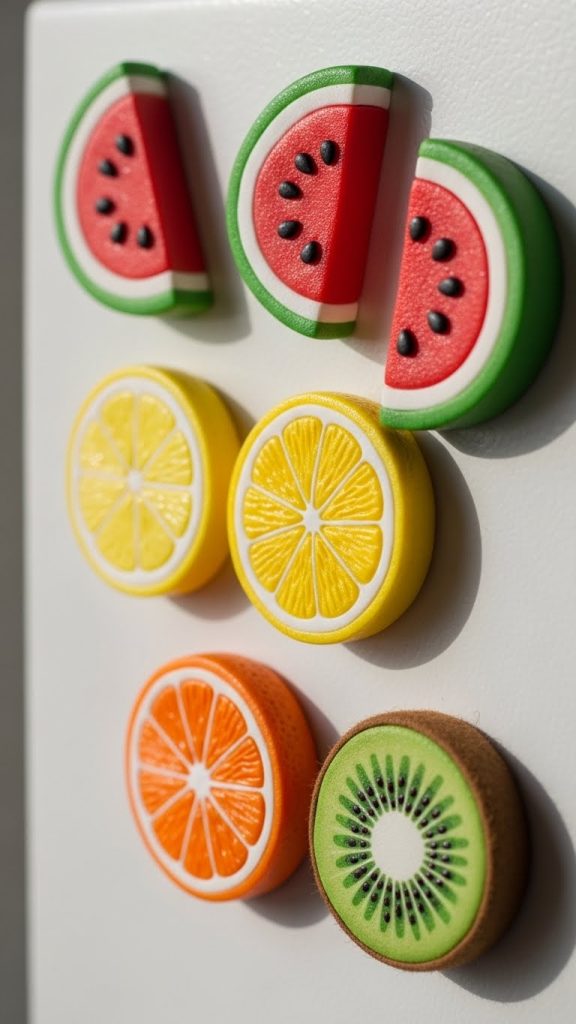
3. Fruit Slice Magnets
Bright and colorful fruit magnets can instantly add a pop of color to your fridge. You can make slices of watermelon, orange, lemon, or kiwi using thin sheets of clay.
Instructions for Fruit Slice Magnets:
- Roll out the clay to a thin sheet.
- Cut out shapes resembling your chosen fruit.
- Add details like seeds and rind using small pieces of clay or by painting.
- Bake or let the clay dry completely.
- Glue a magnet on the back.
These fruit magnets are cheerful, summery, and perfect for adding a fresh vibe to your home.
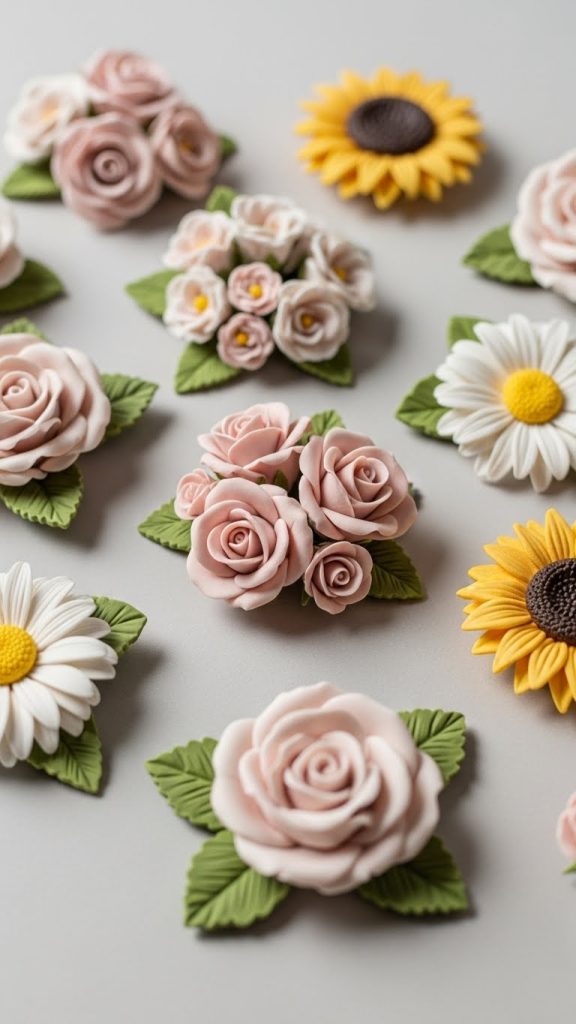
4. Floral Magnets
Floral magnets are timeless and elegant. You can create roses, daisies, sunflowers, or any flower you love.
How to Make Floral Clay Magnets:
- Roll out small balls of clay for petals.
- Flatten each petal and layer them around a small center piece.
- Shape the leaves separately and attach them.
- Bake or air-dry the clay.
- Add a magnet to the back.
Floral magnets are ideal for spring or summer-themed decor, and they also make thoughtful gifts for loved ones.
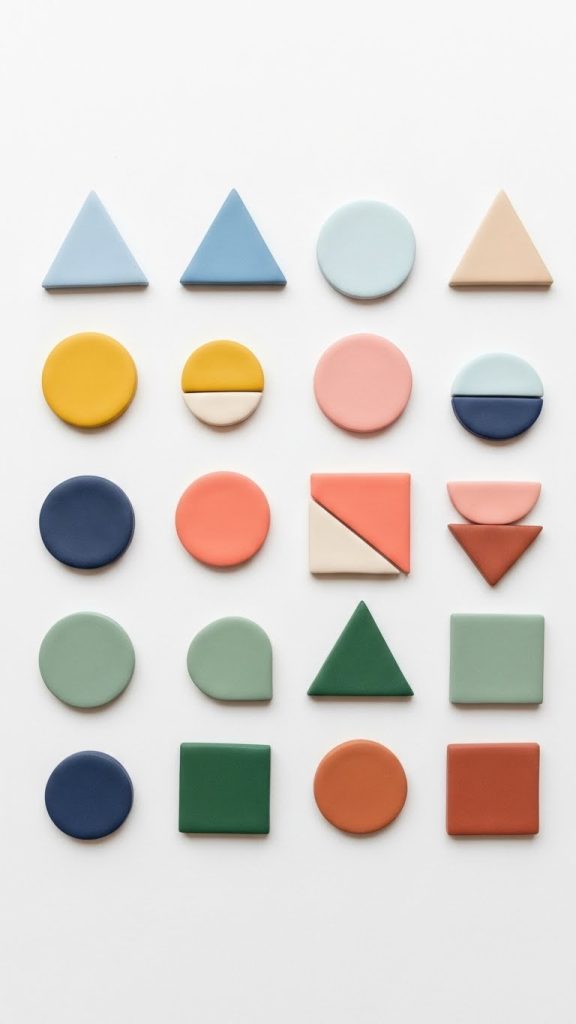
5. Geometric Magnets
If you prefer modern and minimalist designs, geometric clay magnets are a perfect choice. You can create triangles, squares, circles, and abstract shapes.
Steps for Geometric Magnets:
- Condition your clay and choose your colors.
- Cut the clay into clean shapes using a knife or a cutter.
- Bake or air-dry the clay.
- Paint additional patterns if desired, like stripes or dots.
- Attach magnets on the back.
Geometric magnets are great for office spaces or anyone who loves sleek, modern designs.
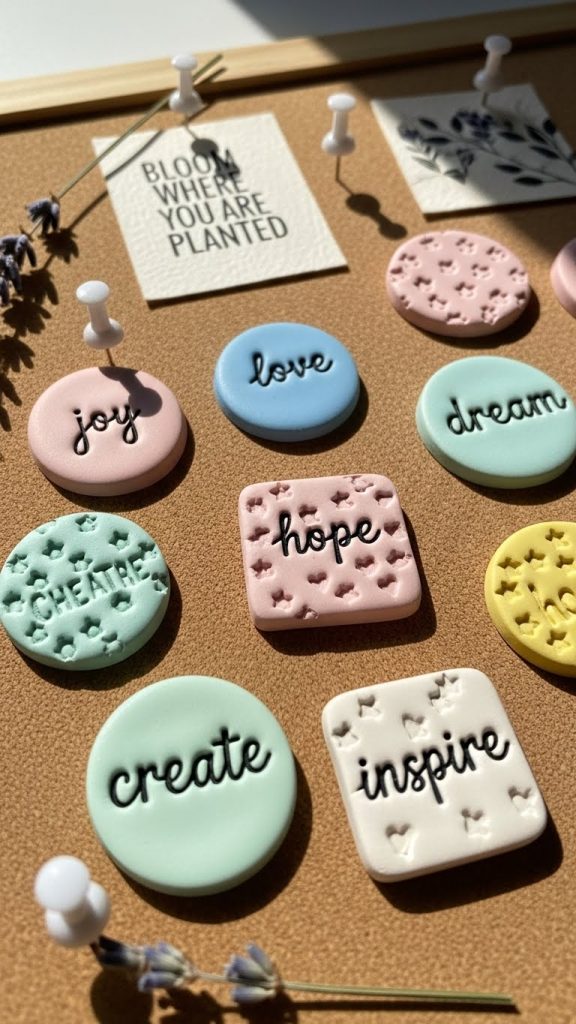
6. Inspirational Quote Magnets
Why not combine creativity with motivation? You can create clay magnets that display small inspirational quotes or words like “joy,” “love,” or “dream.”
How to Make Quote Magnets:
- Roll out clay into small rectangles or circles.
- Use a fine-point tool or pen to write your quote on the clay.
- Bake or air-dry the clay.
- Paint the letters if necessary.
- Glue a magnet on the back.
These magnets are perfect for keeping you inspired every day.
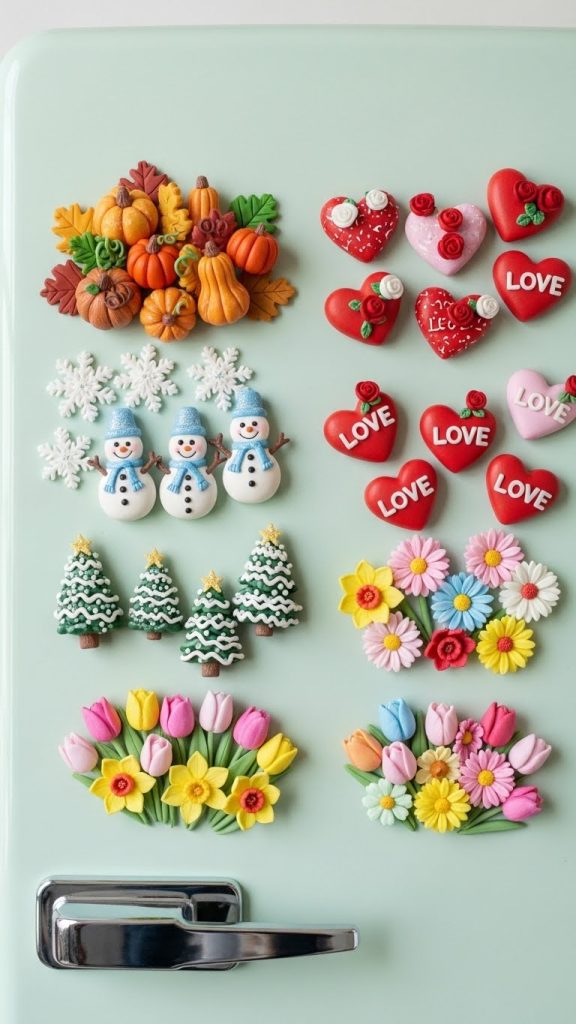
7. Seasonal and Holiday Magnets
Seasonal clay magnets are a fun way to celebrate holidays throughout the year. You can create pumpkins for fall, snowmen for winter, hearts for Valentine’s Day, and flowers for spring.
Creating Holiday Magnets:
- Choose clay colors that match the holiday theme.
- Shape the clay into relevant objects, like pumpkins, snowflakes, or hearts.
- Add small details with sculpting tools.
- Bake or air-dry the clay.
- Attach magnets to the back.
These magnets can be swapped out each season, keeping your decor fresh and festive.
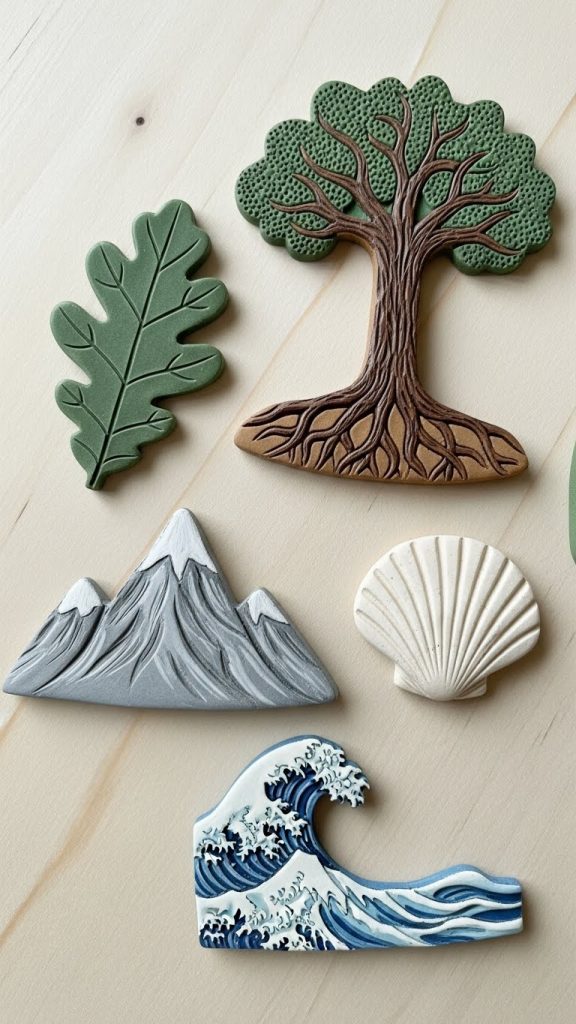
8. Nature-Inspired Magnets
For those who love nature, clay magnets can be designed to resemble leaves, trees, mountains, or even seashells. These magnets bring a calming, earthy vibe to any space.
Steps for Nature Magnets:
- Condition clay in earthy tones like green, brown, or blue.
- Shape the clay into natural forms like leaves or mountains.
- Texture the clay using a toothpick or brush for a realistic look.
- Bake or let dry.
- Attach magnets.
Nature-inspired magnets are perfect for offices, dorm rooms, or any space that needs a touch of tranquility.
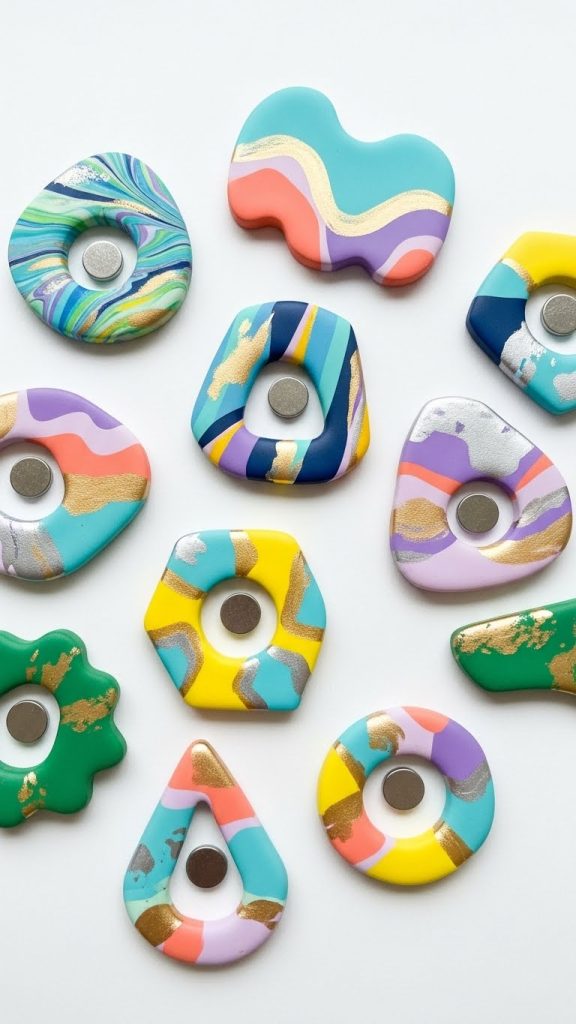
9. Abstract Art Magnets
Abstract clay magnets allow you to experiment with colors, textures, and shapes. These magnets are unique and often one-of-a-kind.
How to Make Abstract Magnets:
- Condition different colors of clay.
- Blend the colors together slightly to create a marbled effect.
- Cut or shape the clay into abstract forms.
- Bake or air-dry the clay.
- Attach magnets.
Abstract magnets are an excellent choice for art lovers who want something unconventional and eye-catching.
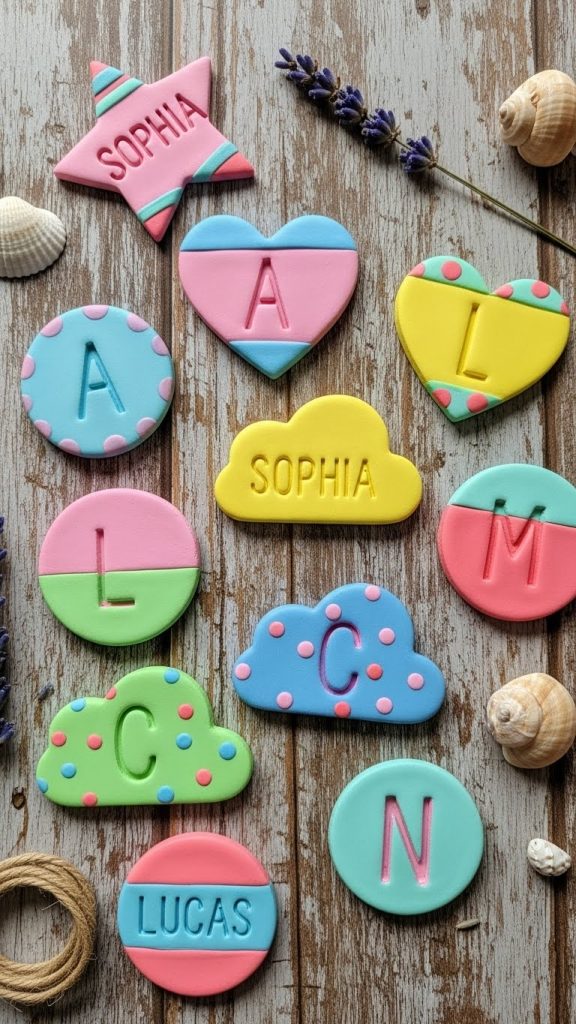
10. Personalized Name Magnets
Personalized magnets are fun and meaningful. You can create magnets with your name, initials, or even nicknames for friends and family.
Steps for Personalized Name Magnets:
- Roll out clay into your desired shape.
- Use clay or paint to create letters.
- Bake or air-dry the clay.
- Seal with a glaze if desired.
- Attach magnets to the back.
These magnets are perfect for gifts or as a fun way to label your fridge or workspace.
Tips for Making Perfect Clay Magnets
- Condition the Clay Well: Properly kneading your clay makes it soft and easier to shape.
- Use Small Magnets: Small disc magnets are powerful enough to hold notes but won’t overwhelm your design.
- Add Texture: Toothpicks, forks, and brushes can add fun textures.
- Seal Your Work: Use a clear glaze for a polished, shiny finish.
- Be Patient: Allow air-dry clay to fully harden before attaching magnets.
- Experiment with Colors: Mix and match clay colors to create unique effects.
- Use Reference Images: Especially for food or animals, reference images can help you get the details right.
Conclusion
DIY clay magnets are a delightful way to express your creativity while adding charm to your home or office. From miniature foods to abstract designs, the possibilities are endless. Not only are they fun to make, but they also make thoughtful gifts for friends and family.
By following these ten DIY clay magnet ideas, you can create a collection of unique and adorable magnets that reflect your personal style. Whether you are crafting for yourself or making gifts for others, these cute clay magnets are sure to bring joy and color into everyday life.
Start small, experiment with shapes and colors, and most importantly, have fun with the process. Happy crafting!


Leave a Reply