
In today’s fast-paced world, staying organized is essential, but buying storage solutions can be expensive. The good news is that you don’t need to spend a lot of money to keep your space tidy. Cardboard is an affordable, eco-friendly, and versatile material that can be transformed into stylish and functional organizers. Whether you want to organize your desk, kitchen, wardrobe, or kids’ study area, DIY cardboard organizers are a smart and creative solution.
This article explores ten easy and practical DIY cardboard organizer ideas that are perfect for beginners and experienced crafters alike.
Why Choose Cardboard for DIY Organizers?
Cardboard is one of the most accessible materials available in most homes. Old shipping boxes, cereal boxes, and packaging cartons can easily be reused instead of being thrown away. Cardboard is lightweight, easy to cut, paint, and decorate, making it ideal for DIY projects. Most importantly, it supports sustainable living by reducing waste.
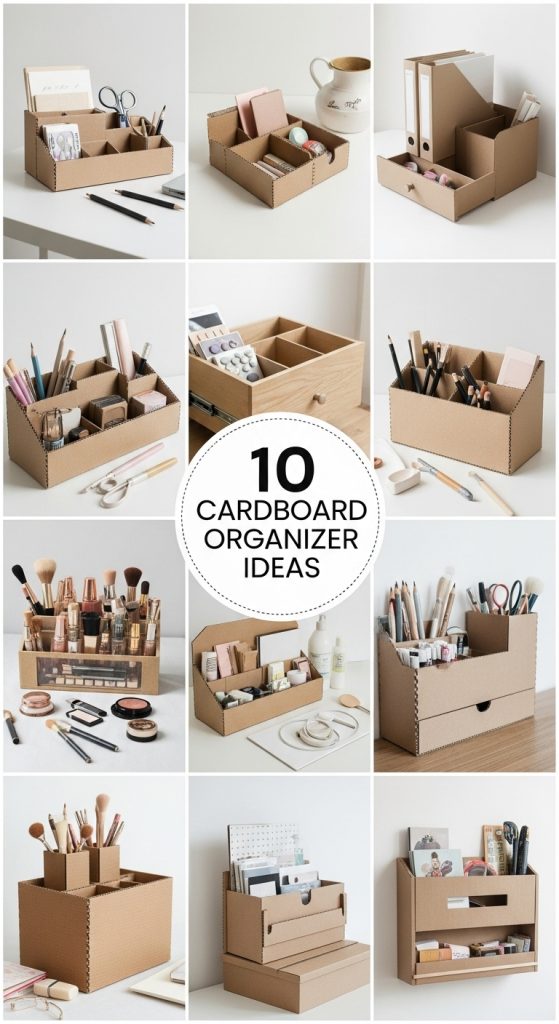
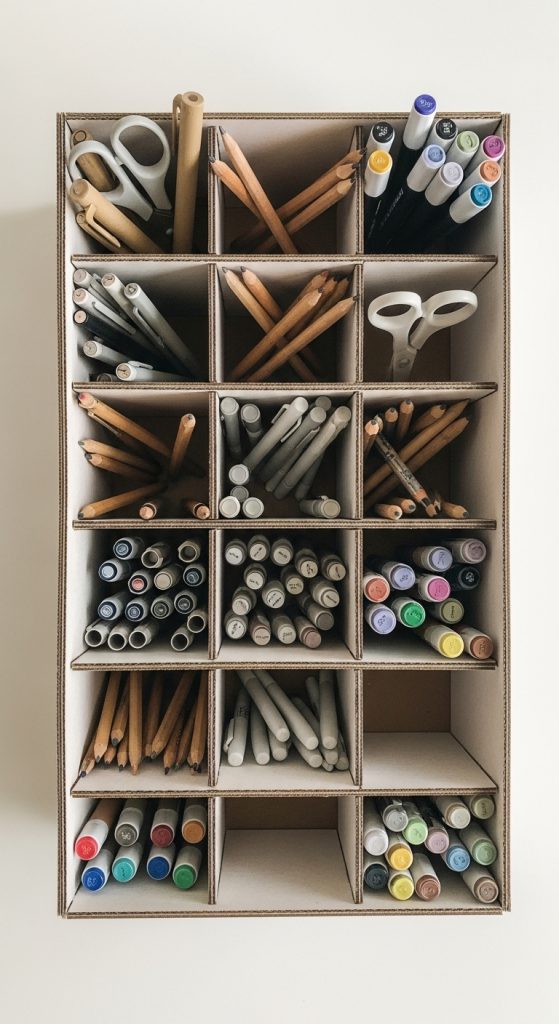
1. Desk Stationery Organizer
A cardboard desk organizer is perfect for storing pens, pencils, markers, scissors, and rulers. You can create multiple compartments using small cardboard pieces and glue them together. Wrap the organizer with decorative paper or paint it to match your workspace. This simple project helps keep your study or office desk neat and clutter-free.
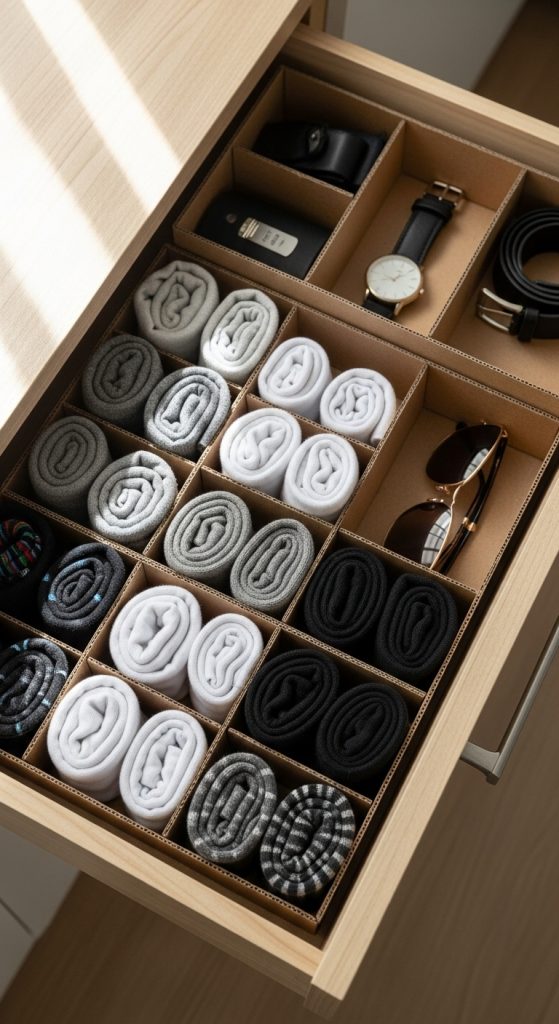
2. Drawer Divider Organizer
Cardboard drawer dividers are a great way to organize socks, accessories, makeup, or office supplies. Cut cardboard strips according to your drawer size and arrange them in a grid pattern. This organizer maximizes drawer space and makes it easier to find items quickly.
3. Magazine and File Holder
Transform thick cardboard into a vertical magazine or file holder. This organizer is perfect for storing magazines, notebooks, folders, and documents. You can give it a professional look by covering it with kraft paper, fabric, or adhesive vinyl. It works well for home offices and study rooms.

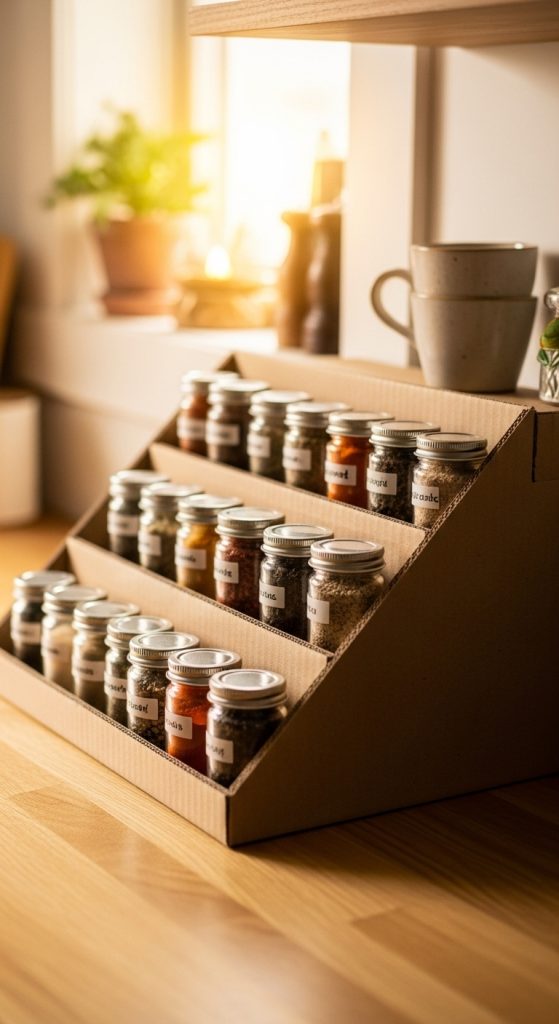
4. Kitchen Spice Organizer
Create a compact cardboard spice organizer to store spice jars, sachets, or small containers. You can design it as a small shelf or stepped rack. Cover it with waterproof paper or laminate for durability. This organizer keeps your kitchen counter tidy and your spices easily accessible.
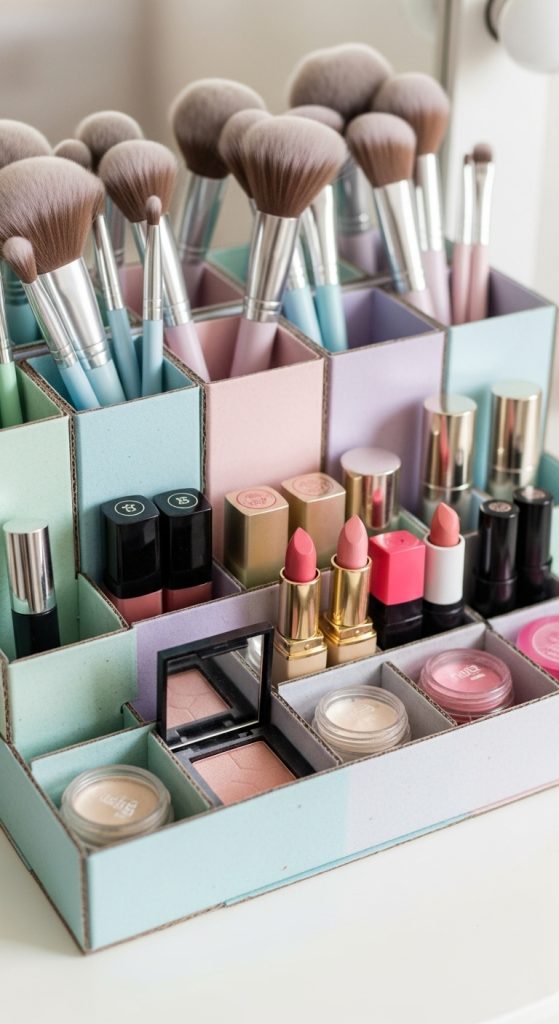
5. Makeup and Cosmetics Organizer
A cardboard makeup organizer is ideal for storing brushes, lipsticks, nail polishes, and skincare products. Add small compartments and decorate it with pastel colors or floral paper. This DIY solution is lightweight and customizable according to your cosmetic collection.
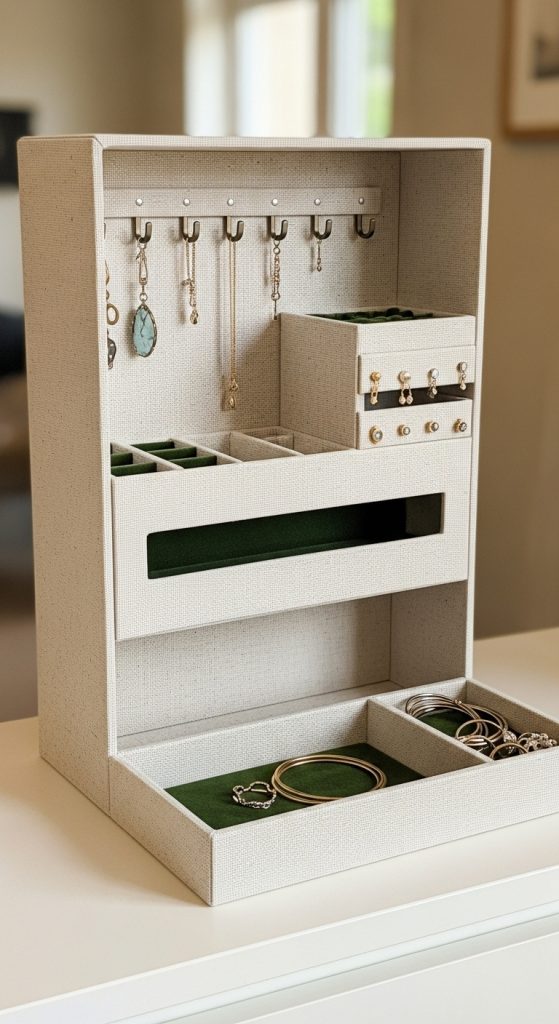
6. Jewelry Storage Organizer
You can design a beautiful cardboard jewelry organizer for earrings, bangles, necklaces, and rings. Add hooks, slots, or small rolls made from cardboard tubes. Decorate it with fabric, glitter paper, or paint for a classy finish. This organizer helps prevent jewelry from getting tangled.
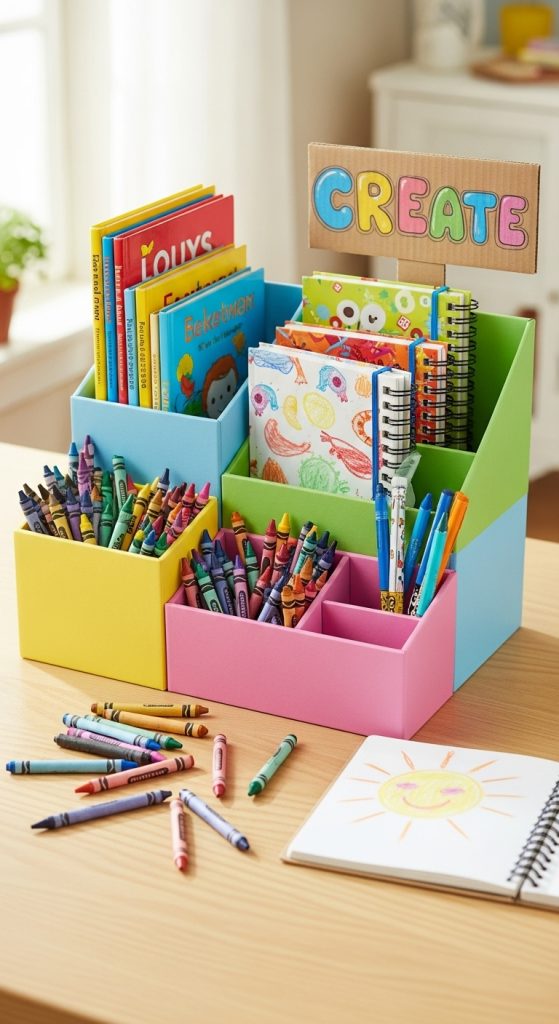
7. Kids’ Study Organizer
A cardboard organizer is perfect for organizing children’s books, crayons, notebooks, and craft supplies. You can make colorful compartments and label them for easy use. This encourages kids to keep their study area clean while making organization fun and creative.
8. Charging Station Organizer
Create a cardboard charging station to organize mobile phones, chargers, earphones, and power banks. Add slots for cables and devices. This organizer is especially useful for bedside tables or work desks and helps reduce cable mess.

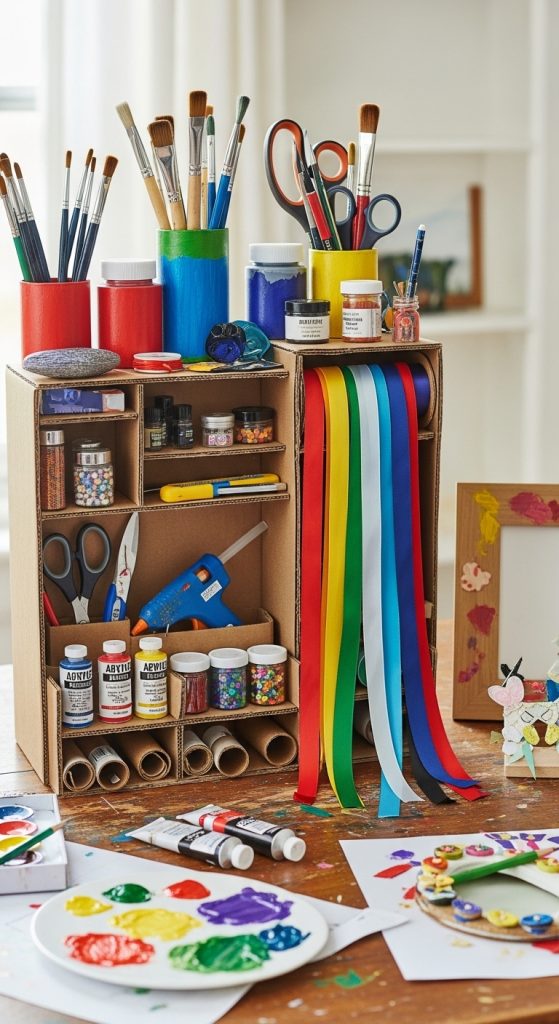
9. Craft Supplies Storage Box
If you enjoy DIY crafts, a cardboard organizer can store ribbons, glue, paints, brushes, and tools. Design drawers or open sections depending on your needs. This organizer keeps all your crafting essentials in one place and improves productivity.
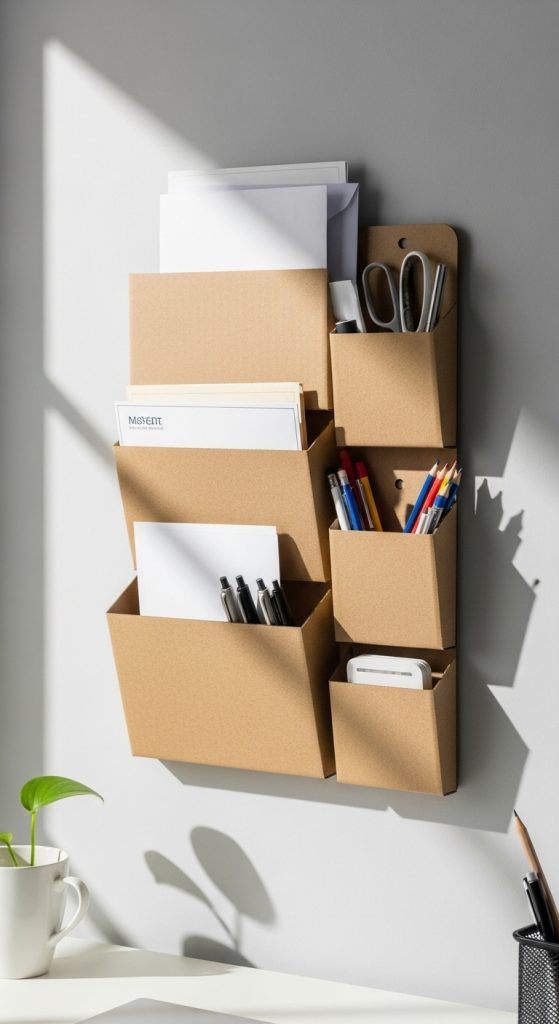
10. Wall-Mounted Cardboard Organizer
A wall-mounted cardboard organizer saves floor space and adds a decorative touch. You can create pockets or shelves to store mail, keys, stationery, or small plants. Secure it properly and decorate it to match your room’s theme.
Tips for Making Durable Cardboard Organizers
To increase durability, always use thick cardboard and strong adhesive. Reinforce edges with extra layers. Cover your organizer with paper, fabric, or clear tape to protect it from moisture. Allow glue and paint to dry completely before use


Leave a Reply