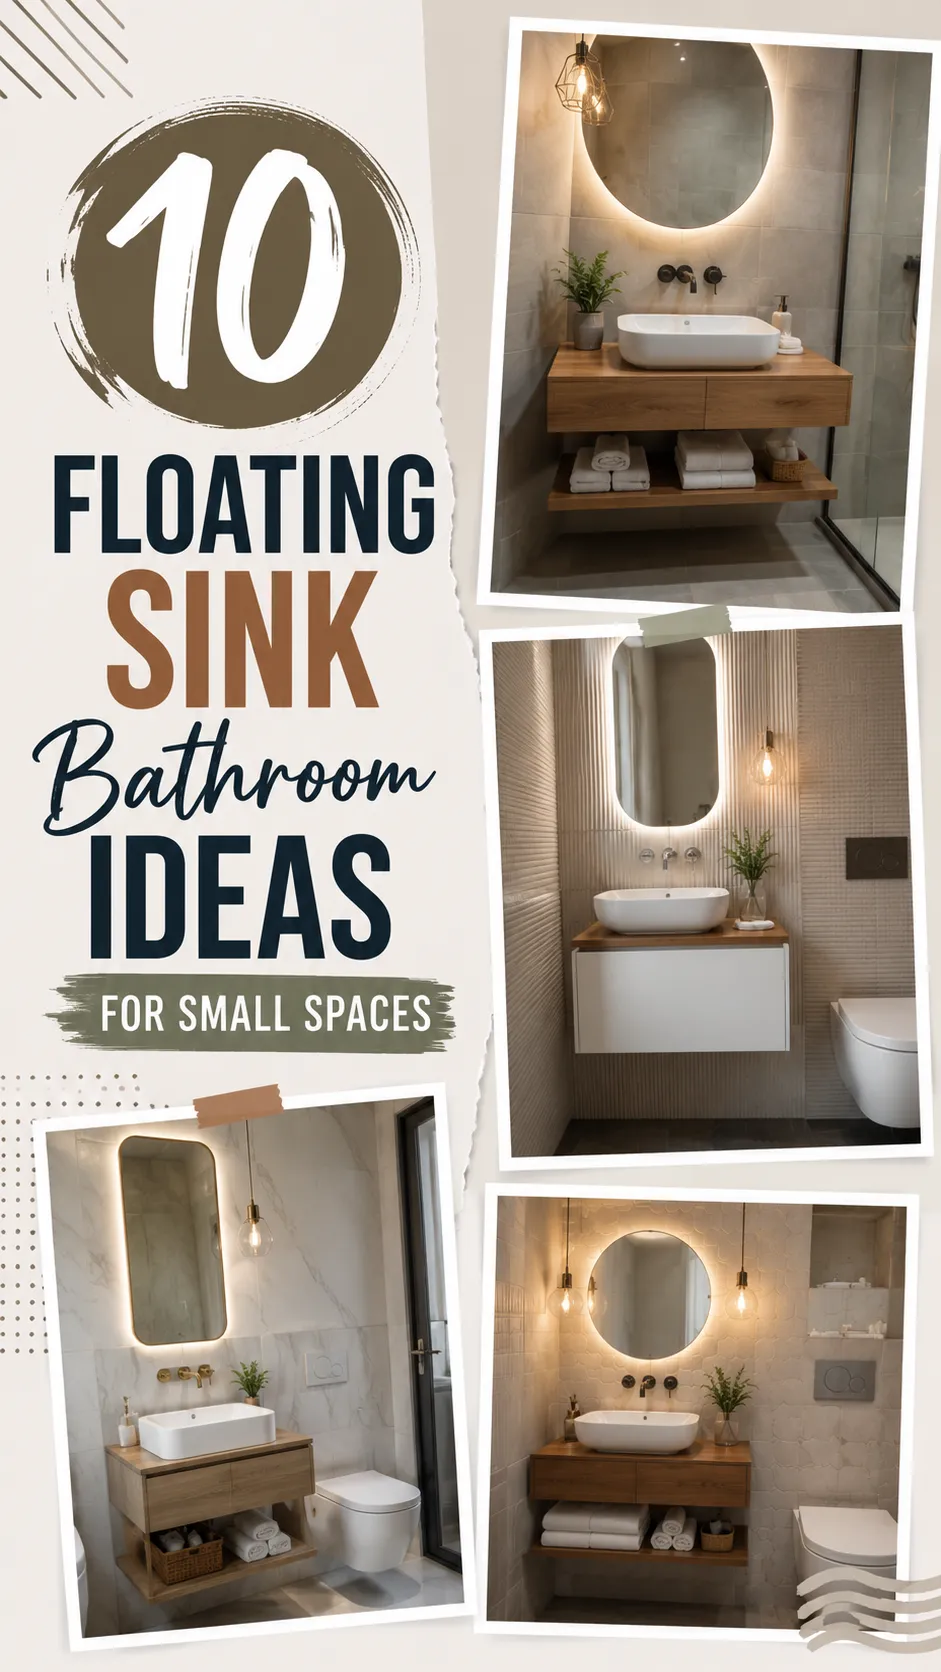
When dealing with a compact bathroom, the floor is your most valuable asset. Every square inch of visible tile contributes to the perception of openness, which is why the floating sink has become the gold standard for small space design. By physically detaching the vanity from the ground, you eliminate the visual “blockage” that standard cabinet vanities create, effectively turning a cramped closet-like room into a breezy, sophisticated retreat. Beyond the obvious space-saving benefits, floating fixtures offer a streamlined, modern aesthetic that is inherently easier to clean and maintain. Whether you are aiming for an industrial edge, a spa-like minimalist vibe, or a warm, eclectic feel, there is a wall-mounted solution that can redefine your bathroom experience.
The magic of these designs lies in their ability to maximize function without sacrificing style. When you remove the heavy, floor-bound cabinetry, you are forced to be more intentional with your storage, often leading to a much tidier, more organized space. This guide explores ten distinct ways to leverage floating sink technology to make your petite bathroom feel like a luxurious sanctuary. From clever corner installations to custom ledge designs that stretch the visual length of your walls, these ideas will show you that even the smallest footprints can support high-design impact.
1. The Minimalist Wall-Hung Basin
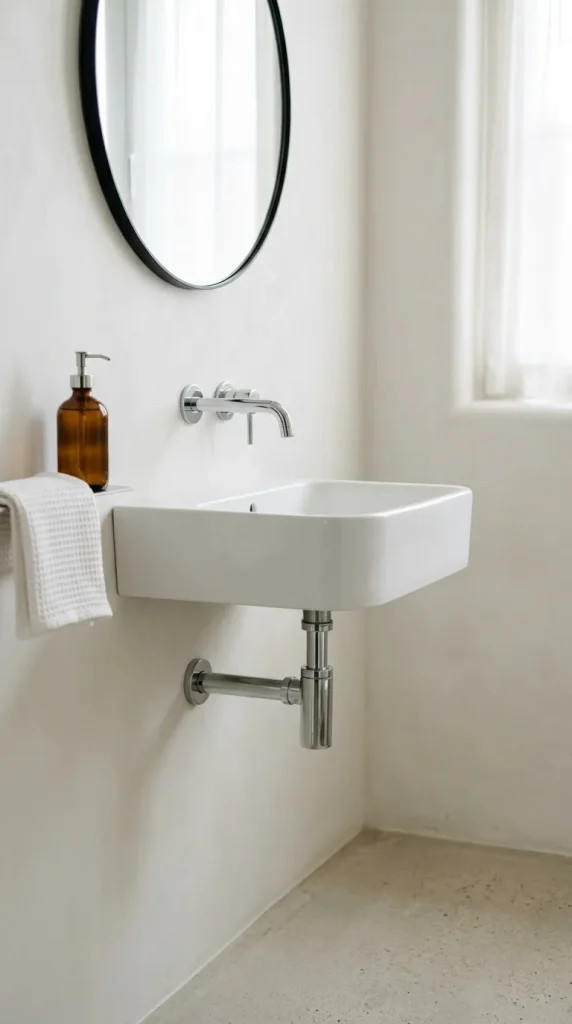
If your primary goal is to strip back the clutter and embrace a “less is more” philosophy, the minimalist wall-hung basin is the perfect starting point. By forgoing cabinetry entirely, you expose the raw architecture of the bathroom, which creates a sense of airiness that standard vanities simply cannot match. This design is exceptionally effective in tight powder rooms where a bulky cabinet would feel overwhelming. The simplicity of a sleek, white ceramic basin suspended against a tiled wall draws the eye upward and outward, keeping the focus on the cleanliness of the lines rather than the lack of space.
How to Make
Purchase a high-quality, wall-mounted ceramic basin. You will need to install a sturdy metal carrier frame—or reinforce your wall studs—to ensure the basin is securely anchored. Once mounted, choose a wall-mounted faucet rather than one that sits on the basin itself. This not only looks more modern but also keeps the area behind the sink completely clear, making it much easier to wipe down. To finish the look, install a polished, decorative P-trap in a finish that matches your faucet, such as matte black or brushed gold, as this pipe will be a visible part of your design.
Things Needed
- Wall-mounted ceramic or stone basin
- Metal wall carrier or reinforced mounting hardware
- Wall-mounted faucet kit
- Decorative P-trap and supply lines
- Plumbing sealant and level
2. Floating Vanity with Open Shelving
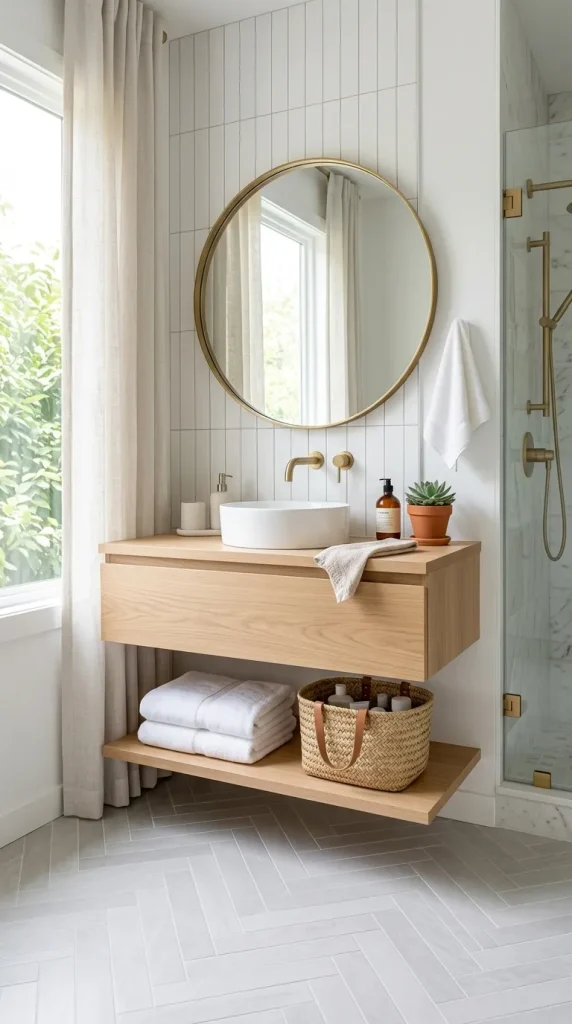
For those who crave storage but fear the heaviness of a closed cabinet, the floating vanity with open shelving is a brilliant compromise. It provides the utility of a traditional unit while maintaining a lightweight, ventilated appearance. By leaving the area beneath the basin open, you allow light to circulate throughout the room, which prevents the “dark corner” effect often seen in small bathrooms. This configuration is ideal for stacking fluffy, white towels or placing a decorative woven basket to hold your extra toiletries, adding warmth and texture without closing off the space.
How to Make
Select a compact, wall-mounted vanity unit that features a single open shelf underneath the sink bowl. Ensure the unit is specifically rated for bathroom humidity. When mounting, verify the height is ergonomically comfortable, typically around 32 to 34 inches from the floor. Keep the shelf organized by using uniform baskets for small items, which prevents the open area from looking cluttered. To style, add a small, moisture-loving plant on the shelf to provide a pop of color, ensuring the open base feels like a purposeful design choice rather than just empty space.
Things Needed
- Wall-mounted vanity unit with an open base
- Moisture-resistant mounting screws
- Decorative baskets for organized storage
- Small indoor bathroom plant
- Level and drill
3. Corner-Mounted Floating Sink
In many small bathrooms, the corner is the most underutilized area, often sitting vacant while the center of the room remains cluttered. A corner-mounted floating sink is engineered to tuck into this negative space, liberating the center of the room and improving the flow of traffic. This configuration is particularly useful in tiny en-suites or half-baths where every inch of floor space matters. Because it is positioned in a corner, it also tends to feel more secure and “tucked away,” creating a private, functional spot that doesn’t impede the door swing or the shower access.
How to Make
Choose a triangular or wedge-shaped basin designed for corner mounting. Ensure that your plumbing lines can be rerouted to the corner, which may require professional help depending on your current setup. Mount the sink using heavy-duty L-brackets that are hidden beneath the basin’s edge. Because corner sinks can be quite small, pair it with a tall, slender faucet to provide enough clearance for washing hands. To maximize the space, install a small corner shelf above the sink for soap and toiletries, keeping the area tidy and efficient.
Things Needed
- Corner-specific triangular basin
- Heavy-duty L-brackets for mounting
- Tall, slender faucet
- Corner-specific shelf for accessories
- Rerouting plumbing materials

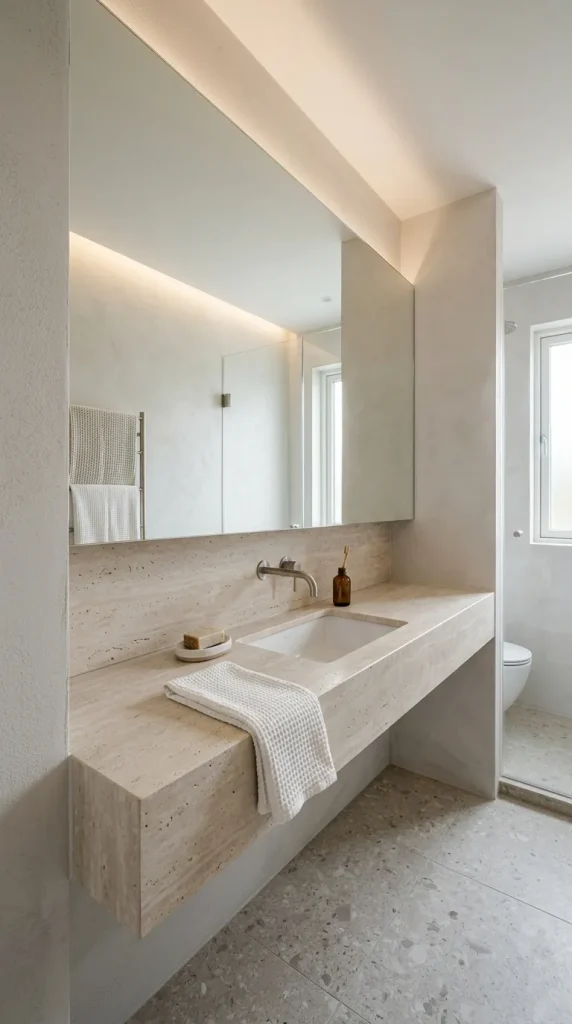
4. Custom Ledge Floating Vanity
If you are looking to create a high-end, custom look, extending a floating vanity as a continuous ledge across the entire length of the wall is the ultimate design hack. This “long” configuration creates a visual illusion of a wider room, as the continuous horizontal line draws the eye from one side of the bathroom to the other. By spanning the full width, you also gain significantly more counter surface for your daily essentials, making the bathroom feel less like a tiny stall and more like a high-end, bespoke boutique washroom.
How to Make
Construct a custom vanity top using a moisture-resistant material such as quartz, solid surface, or sealed concrete. Span this piece from wall to wall, using heavy-duty steel brackets or wall cleats every 16 inches. Under-mount the sink basin to the ledge to keep the surface perfectly flush and sleek. To ensure the space doesn’t feel too long or clinical, install a large, full-width mirror above the ledge, which will bounce light back into the room and reinforce the wide, open feeling you’ve created with the extended vanity top.
Things Needed
- Custom-cut quartz or solid surface slab
- Heavy-duty steel wall cleats or brackets
- Under-mount sink basin
- Full-width wall mirror
- Waterproof silicone caulk
5. Repurposed Furniture Vanity
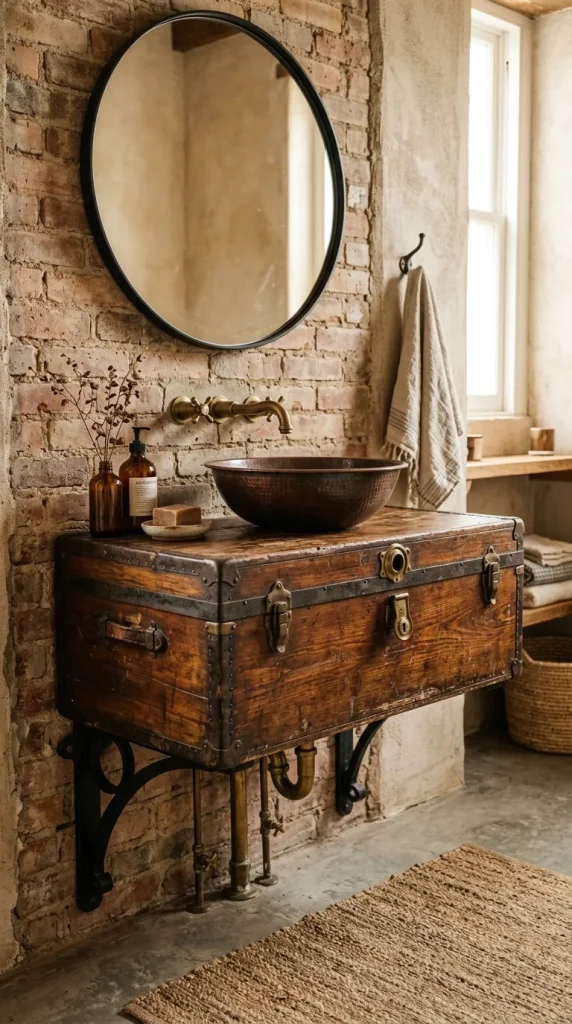
For those who love a bit of history and personality, transforming a small piece of vintage furniture into a floating vanity is an unmatched design choice. A mid-century nightstand or a small, antique wooden chest can be modified and mounted to the wall, instantly providing a character-filled centerpiece for your bathroom. This adds a sense of warmth and lived-in charm to what can often feel like a sterile space. The contrast between the antique wood and the modern, floating installation creates a unique, designer-curated atmosphere that tells a story.
How to Make
Select a small, sturdy wooden cabinet or chest with flat sides. Remove the original legs and cut out the interior back and shelves to accommodate the plumbing pipes. Strengthen the interior frame with wood braces, as you will be mounting the entire piece to the wall studs using heavy-duty bolts. Seal the wood thoroughly with marine-grade varnish to prevent water damage. Install a vessel sink on the top, or cut the top to drop in a sink basin. The remaining drawer space can be utilized for storage, making it both beautiful and highly practical.
Things Needed
- Small vintage wooden cabinet or chest
- Marine-grade wood sealer or varnish
- Heavy-duty wall mounting bolts and brackets
- Vessel or drop-in sink basin
- Plumbing modification parts
6. Floating Vanity with Integrated Lighting
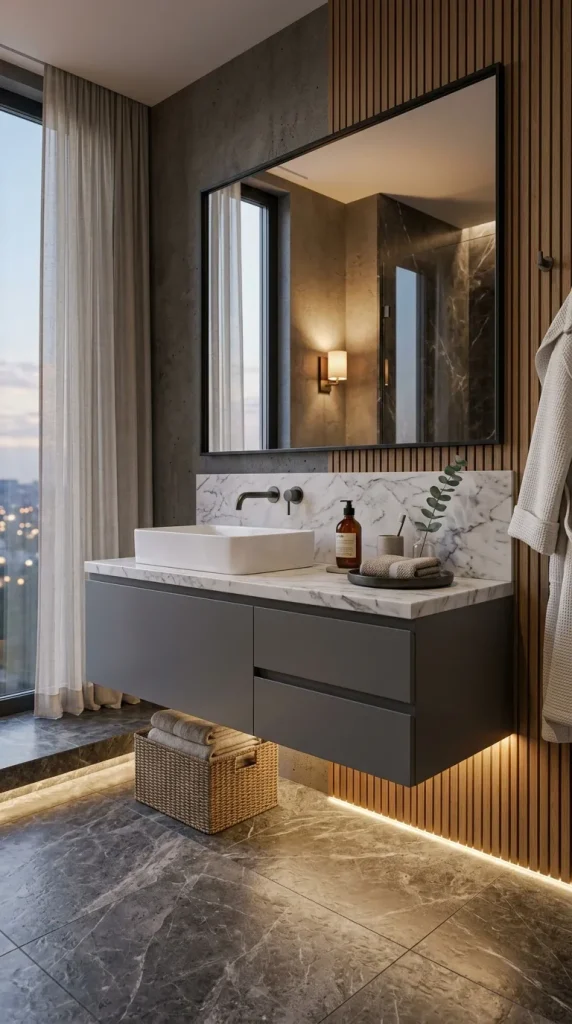
For an instant “wow” factor, choose a floating vanity that features an integrated LED light strip along the bottom edge. This simple addition transforms your bathroom from a standard space into something that feels like a five-star hotel. The soft, ambient light beneath the cabinet not only makes the vanity appear to hover even more dramatically but also acts as a perfect nightlight, providing subtle illumination that prevents you from needing to flip on the harsh overhead lights during late-night bathroom trips.
How to Make
Look for a pre-manufactured floating vanity unit that includes a dedicated channel for LED strips. If you are building your own, attach a small, recessed aluminum channel to the underside of the cabinet and insert a waterproof, battery-operated, or hardwired LED light strip. The light should cast downward toward the floor. When installing, place the light strip toward the back of the underside to ensure the light glows outward across the floor, rather than creating a harsh, direct glare. This creates a soft, luxurious “halo” effect that emphasizes the floating design.
Things Needed
- Floating vanity with LED channel (or separate LED kit)
- Waterproof LED light strips
- Aluminum light channel for diffusion
- Power source (hardwired or battery)
- Wiring accessories
7. Compact Cloakroom Unit
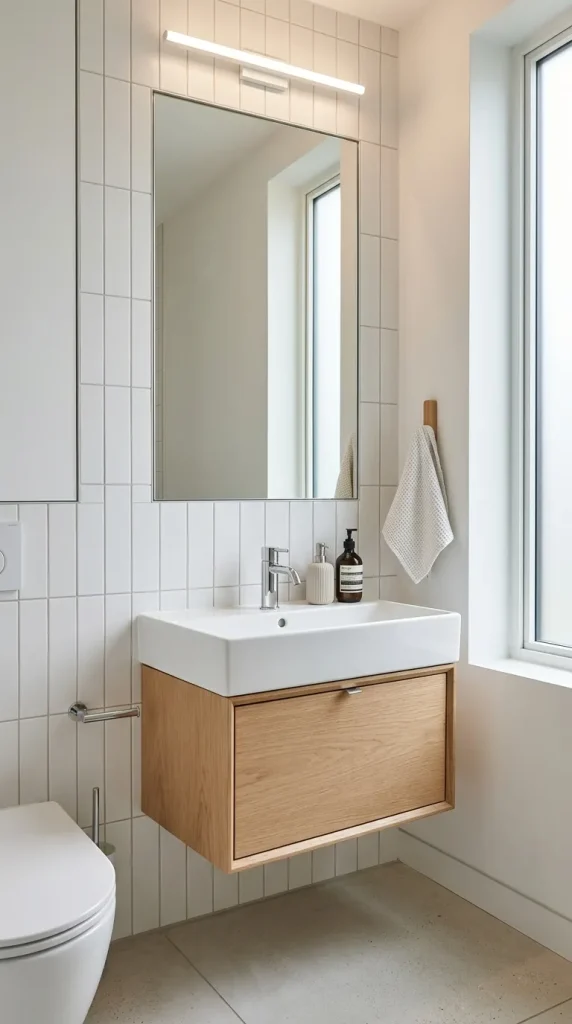
Sometimes, you don’t need a full-sized vanity; you need a “cloakroom” unit. These are specifically engineered to have a reduced depth—often as slim as 12 to 14 inches—making them perfect for extremely narrow bathrooms or powder rooms where a standard vanity would impede foot traffic. Despite their small size, modern cloakroom units are surprisingly efficient, offering a smart basin design and a small cabinet space that is enough to store a roll of toilet paper and hand soap, without ever getting in the way of the door.
How to Make
Search specifically for “cloakroom” or “mini” vanity units. When installing, pay close attention to the positioning of the door swing. These units are often mounted slightly higher than traditional vanities to compensate for their slim profile, which makes them very comfortable to use while standing. Since you are sacrificing counter space, complement the unit with a recessed medicine cabinet in the wall above it, which provides hidden storage for all your bottles and grooming tools, ensuring the sink surface stays completely clear and clean.
Things Needed
- Compact cloakroom-style vanity unit
- Recessed medicine cabinet
- Narrow faucet compatible with compact basins
- Wall-mounting hardware
8. Concrete or Stone Slab Sink
For those who admire industrial design, a thick, raw concrete or stone slab creates an incredibly durable and sophisticated floating counter. The sheer weight and texture of the material serve as a striking focal point, providing a grounded, organic feel that contrasts beautifully with the open, empty floor space below. This style feels permanent and expensive, effectively elevating a small bathroom from basic to bespoke. Because these slabs can be heavy, they act as an anchor, allowing the rest of the room’s design to remain simple and restrained.
How to Make
Source a thick slab of concrete, quartz, or natural stone from a stone fabricator. Ensure the slab is sealed properly to prevent staining in a high-moisture environment. Mount the slab using massive, industrial-grade steel brackets that are bolted directly into the wall studs. Place a modern vessel sink on top of the slab to emphasize the floating effect, or opt for a stone-integrated basin if you want a seamless look. Keep the surroundings minimalist—perhaps a simple mirror and one statement pendant light—to let the slab remain the star of the room.
Things Needed
- Custom stone or concrete slab
- Industrial-strength steel mounting brackets
- Vessel or integrated sink basin
- Stone sealer (penetrating type)
- Heavy-duty wall bolts

9. Asymmetrical Floating Sink
In a tiny bathroom, space is rarely distributed evenly. An asymmetrical floating vanity—where the sink bowl is pushed to one side, leaving a longer stretch of counter on the other—is a genius solution for maximizing utility in a narrow spot. By offsetting the basin, you create a dedicated “landing zone” on the counter for your essentials like a toothbrush holder, a soap dispenser, or even a small decorative tray. It feels custom-designed for the room’s constraints and prevents the common problem of having a sink but absolutely nowhere to set anything down.
How to Make
When planning your vanity, select a vessel or drop-in sink that can be mounted off-center. If building a custom unit, extend the vanity top to one side to allow for the extra counter space. This design is highly functional; use the longer side for your frequently used items and the shorter side for the sink bowl. Ensure the faucet is mounted on the side or the corner of the basin to keep the counter clear. This configuration creates a more interesting, dynamic look than a standard centered sink, adding a designer touch to a tiny space.
Things Needed
- Offset or vessel-style sink basin
- Custom vanity top or offset-ready unit
- Faucet with appropriate reach
- Decorative tray for the landing zone
- Wall-mounting hardware
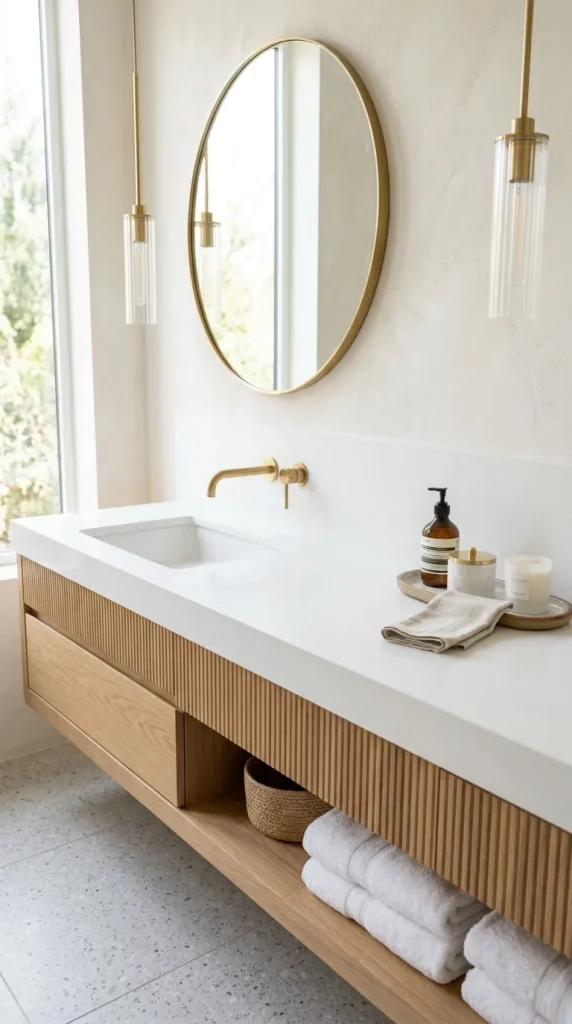
10. The “Pedestal” Hybrid
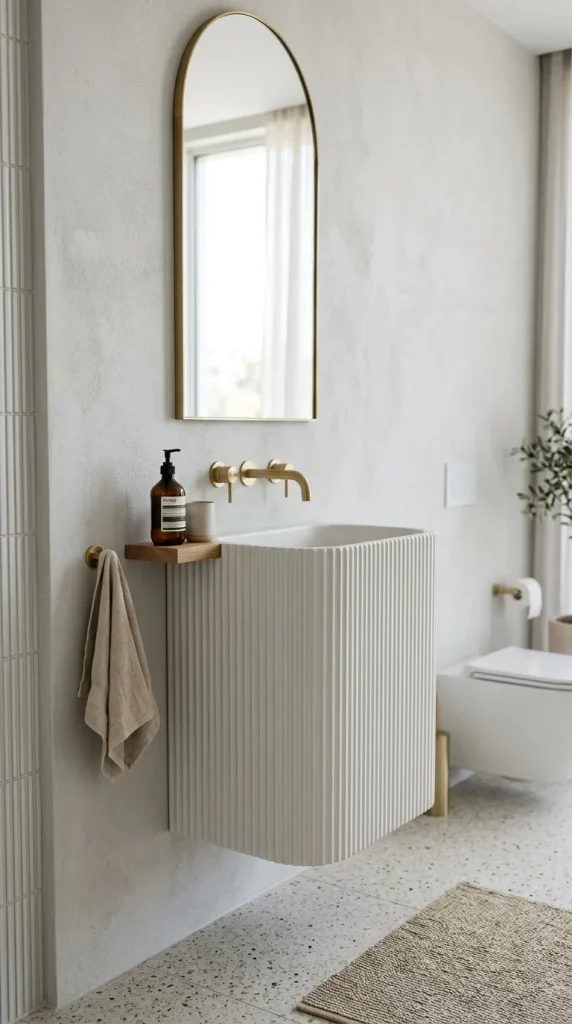
If you love the open floor space provided by a floating sink but don’t want to sacrifice the classic silhouette of a pedestal sink, the hybrid “wall-mounted pedestal” is your answer. These are essentially pedestal sinks that are bolted to the wall, leaving a small gap at the bottom, or modern sculptural units that attach to the wall while maintaining a slender, elegant vertical stem. They give you the best of both worlds: the floor-clearing benefits of a floating unit with the timeless, graceful look of a traditional pedestal.
How to Make
Look for modern “wall-mounted pedestal” designs. These units are often cast from high-quality ceramic or stone and are mounted via internal bolts hidden within the base. The lack of a true floor-contact point makes the bathroom floor feel continuous, which is the key to creating the sense of space. Because these units are sculptural, let them stand alone. Use a simple, large mirror above and avoid surrounding them with bulky cabinets, which would detract from their elegant form. They are perfect for a classic, clean aesthetic that feels light and uncluttered.
Things Needed
- Wall-mounted pedestal sink unit
- Internal mounting bolts and anchors
- Decorative plumbing P-trap (if the stem is open)
- Large wall mirror
- Minimalist bathroom accessories
Ensuring Success in Small Bathrooms
- The Power of the P-Trap: When your pipes are on display, do not settle for plastic. A chrome, brass, or matte black decorative P-trap can become a jewelry-like accessory for your sink, proving that utility can also be beautiful.
- Recess Your Storage: Floating vanities reduce your storage capacity. Combat this by installing a mirrored medicine cabinet that is recessed into the wall studs. This provides deep storage that is completely hidden, keeping your vanity surface pristine.
- Embrace the Glow: Lighting makes or breaks a small bathroom. Place your vanity lighting at eye level (on the mirror or wall) rather than just overhead. This eliminates harsh shadows under your eyes and creates a flattering, professional-level grooming environment.
- Consistent Finishes: In a tiny room, avoid mixing too many metal finishes. Stick to one cohesive tone (like brushed nickel or oil-rubbed bronze) for your faucet, P-trap, and hardware. This visual unity makes the room feel larger, more organized, and intentionally designed.



Leave a Reply