10 DIY Nightstand Makeover Ideas

•

Your nightstand is the last thing you see before falling asleep and the first thing you greet in the morning. If yours has become a graveyard for empty water glasses, tangled cords, and peeling veneer, it is time for a refresh. A nightstand makeover is one of the most rewarding DIY projects because it is low-risk, high-impact, and can be completed in a single weekend. By transforming a tired piece of furniture, you not only save money but also infuse your bedroom with a custom look that aligns with your evolving aesthetic.
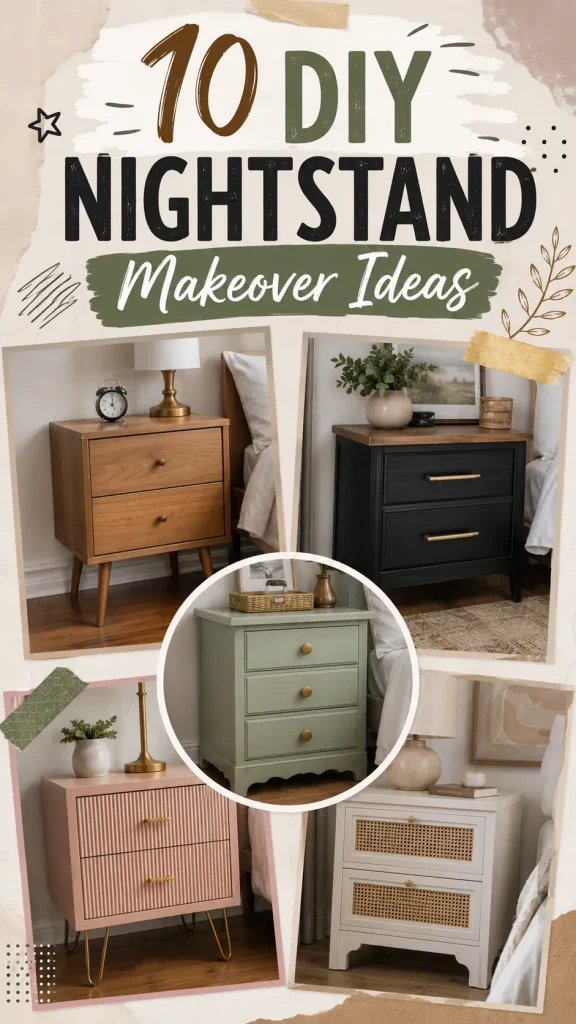
Whether you are working with a $5 thrift store find or a dated piece you’ve had for years, the path to a high-end look lies in the details—new hardware, updated paint, or creative textures. Here are ten DIY nightstand makeover ideas designed to turn your bedside table into a functional, beautiful focal point.

1. The Chic Cane-Webbing Upgrade

Cane webbing is the hallmark of modern, organic interior design. It adds texture, breathability, and that coveted “boho-luxe” feel. If you have a nightstand with a solid drawer front, you can easily swap it out for a cane panel to transform a basic boxy unit into an airy, designer-style piece.

How to Make

Remove the drawer front and use a jigsaw to cut out the center, leaving a 1-inch border. Soak a piece of cane webbing in warm water for 30 minutes to make it pliable. While it’s damp, stretch it across the opening and staple it to the back of the wood border. Trim any excess, then cover the staples with a thin piece of wood trim for a clean finish. Paint the entire nightstand in a creamy off-white or sage green to complete the transformation.

Things Needed

  • Jigsaw
  • Cane webbing roll
  • Staple gun
  • Thin wood trim
  • Wood glue
  • Paint of your choice

2. Geometric Wood Slat Detail

Slatted furniture creates a sophisticated, architectural look that feels incredibly expensive. By adding wooden dowels or half-round trim to the front of your nightstand, you create depth and shadows that elevate a simple piece into a custom statement item.

How to Make

Measure the height of your nightstand drawer or door and buy enough half-round wooden trim pieces to cover the front surface. Cut the trim to fit, then use wood glue and a few small brad nails to attach them side-by-side until the entire front is covered. Once the glue dries, paint the entire unit a single color—like deep charcoal or matte black—to let the texture of the slats become the main attraction.

Things Needed

  • Half-round wooden trim
  • Wood glue
  • Brad nailer or hammer/nails
  • Measuring tape and saw
  • Matte finish paint
  • Paintbrush

3. The Modern Brass-and-Marble Faux Finish

You don’t need a massive budget to get the look of high-end stone and metal. With a bit of peel-and-stick contact paper and some hardware upgrades, you can fake the look of a luxury bedside table in under two hours.

How to Make

Clean the top of the nightstand thoroughly. Apply a high-quality marble-print contact paper to the top surface, using a squeegee to remove any air bubbles. For the drawers, add minimalist, brushed-brass finger pulls. If the original nightstand legs are dated, swap them out for tapered, mid-century-style legs with brass tips. The combination of marble, clean lines, and gold accents creates a “boutique hotel” vibe that looks much pricier than it is.

Things Needed

  • Marble-effect contact paper
  • Squeegee
  • Brushed-brass finger pulls
  • Mid-century modern style legs (optional)
  • Screwdriver

4. The “Pressed Flower” Resin Top

If you want something truly romantic and one-of-a-kind, why not turn your nightstand top into a piece of art? Pressed flowers preserved under a clear resin coat create a stunning, botanical look that feels custom-made for a feminine bedroom.

How to Make

Collect and press your favorite flowers (or buy them pre-pressed) in a heavy book for a week. Arrange them in a beautiful pattern on the top surface of the nightstand. Once you’re happy with the placement, pour a thin, level layer of clear casting resin over the top. Use a heat gun to pop any bubbles. Once it cures (usually 24 hours), the result is a glossy, durable, and completely unique surface that celebrates nature.

Things Needed

  • Pressed flowers
  • Clear casting resin
  • Heat gun (to remove bubbles)
  • Painter’s tape (to create a dam around the edge)
  • Gloves and mixing cups

5. Painted Ombré Effect

An ombré paint job is a fun way to bring color into a bedroom without it becoming overwhelming. By transitioning from a dark shade at the bottom to a light shade at the top, you create a gradient that feels artistic and intentional.

How to Make

Choose three shades of the same color—a dark, a medium, and a light. Start by painting the bottom drawer in the dark shade, the middle in the medium, and the top in the light. For a softer transition, use a dry brush while the paint is still wet to blend the edges where the colors meet. This works exceptionally well on nightstands with three distinct drawers, providing a clear canvas for your color story.

Things Needed

  • Three shades of the same paint color
  • Quality paintbrush
  • A dry blending brush
  • Painter’s tape
  • Drop cloth

6. Upholstered Fabric Fronts

Why not bring the softness of your bed into your nightstand? Upholstering the drawer fronts with fabric—like velvet, linen, or a patterned cotton—adds warmth and a cozy, tailored feel to the room.

How to Make

Cut a piece of foam padding to the size of the drawer front. Place your chosen fabric over the foam, wrap it around the back of the drawer front, and staple it securely. Reattach the drawer front to the drawer. This is a brilliant way to introduce a splash of color or a fun pattern into your bedroom without committing to an entire piece of furniture. It also feels great to touch every night!

Things Needed

  • Upholstery fabric (velvet or linen works best)
  • Thin foam padding
  • Staple gun
  • Scissors
  • Screwdriver

7. The Distressed “Shabby-Chic” Refresh

Sometimes, a piece just needs a little bit of character. Distressing is a classic DIY technique that makes a new piece of furniture feel like a beloved heirloom. It’s perfect for nightstands that have a bit of ornate carving.

How to Make

Paint the nightstand in a soft color like dove grey or antique white. Once the paint is completely dry, use a piece of medium-grit sandpaper to gently rub away the paint on the edges, corners, and areas where natural wear would occur. To finish, apply a dark furniture wax over the entire piece and wipe it off. The wax will settle into the sanded areas, giving the piece an authentic, aged appearance.

Things Needed

  • Furniture paint (chalk paint is ideal)
  • Medium-grit sandpaper
  • Dark furniture wax
  • Wax brush or lint-free cloth

8. Tiled Mosaic Top

For a look that is bold, colorful, and durable, a tiled top is the way to go. Using small, colorful square tiles, you can create a mosaic that matches your room’s color palette perfectly.

How to Make

Clean the top of the nightstand and apply a thin layer of tile adhesive. Press your tiles into the adhesive, creating a grid or a pattern. Once the adhesive is set, apply grout over the entire top, wiping away the excess with a damp sponge before it dries. The result is a rock-solid, stain-resistant, and high-texture surface that is perfect for placing a hot mug of tea or a cold glass of water.

Things Needed

  • Small square tiles (ceramic or glass)
  • Tile adhesive
  • Grout
  • Spreading trowel
  • Sponge for cleaning

9. Leather Handle & Contrast Edge

If you love a clean, “masculine-chic” aesthetic, sometimes all you need is a change in hardware and a small pop of contrast color.

How to Make

Paint the nightstand a crisp matte white. For the hardware, replace traditional pulls with simple strips of leather (you can buy these pre-made or cut your own from a belt). For the contrast, paint the very edges or the “inner” frame of the nightstand a bold, secondary color like navy or forest green. The leather handles add warmth and movement, while the inner-edge color creates a frame that makes the piece pop.

Things Needed

  • Matte furniture paint
  • Leather strips (or pre-made pulls)
  • Small brass bolts/screws
  • Secondary color paint for the edges
  • Small detail brush

10. Floating Nightstand Conversion

If your bedside floor is cluttered, the most transformative makeover is to take the legs off entirely and turn your nightstand into a floating unit.

How to Make

Remove the existing legs from your nightstand and fill the holes with wood filler, sanding until smooth. Paint the exterior to match your wall color—this helps it “disappear” into the wall. Mount the nightstand to the wall using heavy-duty L-brackets or a French cleat system, positioning it at the perfect height for your bed. It immediately makes the room feel larger, more modern, and easier to clean.

Things Needed

  • Heavy-duty L-brackets or French cleat
  • Wood filler and sandpaper
  • Wall paint (to match the unit)
  • Drill and level
  • Stud finder

•

Leave a Reply

Your email address will not be published. Required fields are marked *